
Comprehensive Hangboard Training Guide
If you're dedicated to rock climbing and aiming to enhance your finger strength, grip, and overall climbing power, hangboard training is essential. A hangboard, also known as a fingerboard or training board, is a portable device designed to isolate and develop finger strength by hanging from various edges, holds, and rungs.
Whether training for bouldering, sport climbing, or trad routes, incorporating hangboard exercises into your routine can significantly improve the endurance and strength of your fingers and forearms.
Hangboards come in different styles and materials, including wood grips like the Metolius wood grips or compact boards. They feature multiple edges such as triple rung or vertical holds to target specific finger positions. This focused training not only boosts raw finger strength but also enhances grip technique on challenging climbing holds. Effective use requires understanding proper protocols and safe progressions to avoid injury and maximize gains.
Many climbers train outdoors or use portable boards, allowing you to add hangboard sessions even while camping or traveling. This adaptability, combined with its direct impact on performance, makes hangboard training a valuable addition to your overall climbing program. In the following sections, we’ll explore key benefits, essential equipment, and methods to ensure your hangboard training is both effective and safe.
Key Benefits of Hangboarding

Increasing Finger Maximal Strength
[Explain how hangboarding enhances maximal finger strength]
One primary advantage of hangboard training is the targeted increase in finger maximal strength (MFS). MFS refers to your ability to hold a grip for a short duration, typically 5 to 10 seconds, which is essential for executing difficult crux moves or holding tiny or sloping edges. Hangboard exercises use isometric contractions, meaning you hang statically without joint movement, focusing on key grips like full crimp, half crimp, and open-hand positions.
This training isolates finger muscles more effectively than general climbing, enabling you to hang on smaller holds and improve lock-off strength essential for tougher climbs.
Improving Strength-Endurance
[Describe how hangboarding enhances strength-endurance]
Besides boosting maximal strength, hangboard protocols also enhance strength-endurance—the ability to maintain gripping force over longer periods. Workouts that involve repeated hangs with controlled rest intervals build stamina in the finger flexors and forearms.
Research indicates that even brief, consistent hangboard programs can significantly increase both the stamina and endurance of climbers' finger muscles. This improved capacity allows you to sustain prolonged sequences on the wall without rapid fatigue, directly translating to stronger performance during sustained climbs or multi-pitch routes.
Transfer to the Wall
[Explain the direct benefits of hangboarding to climbing performance]
Hangboard training offers direct transfer benefits to rock climbing performance. By developing finger strength and endurance on holds that mimic climbing grips, you prepare your muscles and tendons to work more effectively on actual rock holds. This specificity means that even if you’re not currently climbing outdoors or at your gym, focused hangboard routines build the contact strength and power endurance needed for harder routes and controlling challenging cruxes.
Importantly, combining hangboard workouts with regular climbing ensures strength gains translate smoothly to the wall without risking overtraining.
Essential Equipment and Setup

Choosing and Measuring the Edge
[Guide on selecting and measuring hangboard edges]
When setting up your hangboard, carefully selecting and measuring the edges you will use is essential for effective training. Edges vary in depth, typically ranging from large jugs to very shallow crimps or pinches.
Choosing the right edge depends on your finger strength level and the specific fingers or grips you want to train. Fingerboard edges are usually measured in millimeters, with a standard 20 mm edge being the baseline. A good progression includes starting on deeper edges and gradually moving to smaller, more challenging ones.
Precise measurement helps you track progress and ensures you don't skip stages that might increase injury risk. For finger strength training, edges between 10 mm to 20 mm are common starting points, with smaller edges added as your strength improves.
Load or Assistance
[Explain how to adjust load or assistance during training]
Hangboard training isn’t limited to hanging your body weight. To fine-tune your regimen and safely push your limits, you can add extra load with weight belts or weighted vests. Conversely, if you’re a beginner or rehabbing an injury, using assistance bands or stepping on a box can reduce the load on your fingers and tendons.
This ability to adjust resistance lets you precisely control intensity to suit your current level and goals. For example, using a portable hangboard at home, you might start with assisted hangs and slowly add weight as your finger strength improves. Monitoring load progression is key to safe and effective hangboard training.
Suspension Technique
[Detail proper suspension technique]
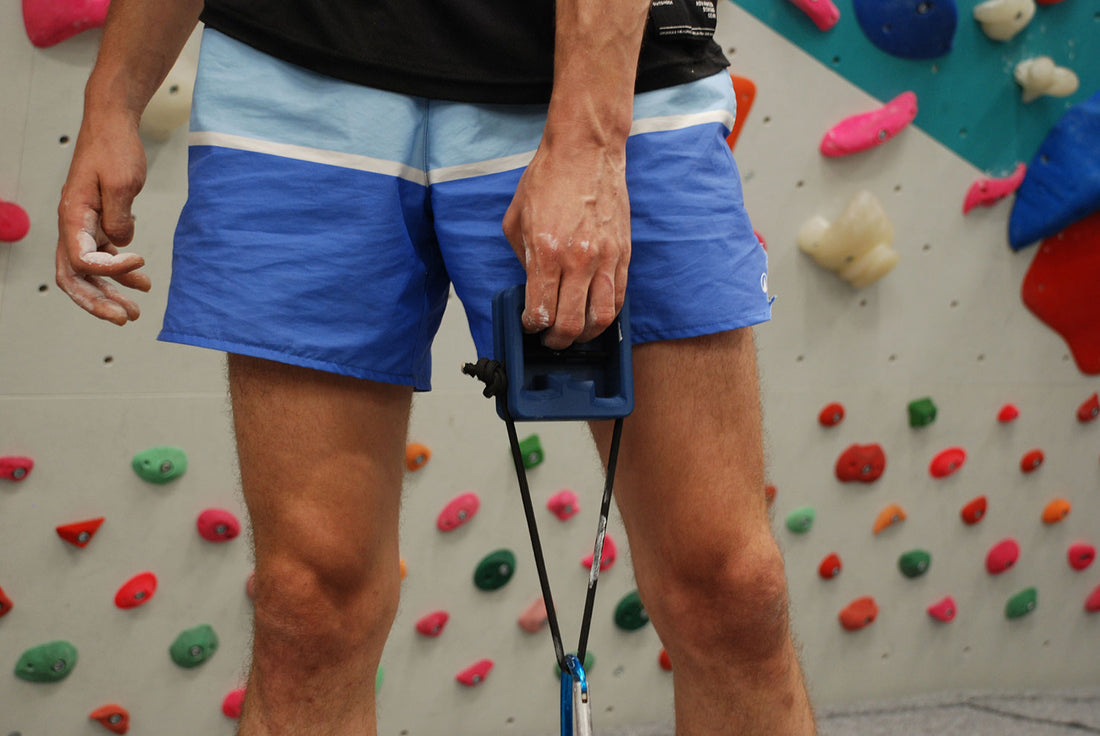
Proper suspension technique on the hangboard is essential to maximize gains and avoid injury. Focus on hanging with your shoulders engaged—not completely relaxed—by slightly pulling your scapulae down and back to protect your shoulder joints.
Maintain a slight bend in your elbows instead of locking them out, which helps stabilize your position and reduce strain on the tendons. Use controlled movements to get on and off the board, avoiding jerky motions. Many climbers use a pull bar or a sturdy door frame mount for stable support when mounting their training board.
Mastering suspension technique enhances grip efficiency and preserves long-term finger health for your climbing pursuits.
Effective Hangboard Routines
Beginner Access
[Provide a beginner-friendly hangboard routine]
For those new to hangboard training, starting with a beginner-friendly routine is essential to build strength safely without risking injury. A simple approach is to choose holds you can hang with good form for about 10 seconds but struggle to hold beyond 14–15 seconds. A popular beginner protocol includes hanging for 10 seconds followed by a 30-second rest, repeating this for 4 repetitions and 3 sets per session, with about 2 minutes rest between sets.
Sessions should occur twice weekly while ensuring full recovery and a proper warm-up beforehand. This gradual build-up lays the foundation for more advanced training and helps develop finger strength and endurance progressively.
Intermediate Finger Strength
[Outline a routine for intermediate climbers]
Once comfortable with the basics, you can increase intensity by reducing rest times and increasing the number of sets and repetitions. For intermediate climbers, a good routine might involve 10-second hangs with 20-second rests, performing 4 to 5 reps per set and 3 to 4 sets per session. The holds used can be smaller or less positive edges, such as shallower crimps or pinch grips on your hangboard.
Incorporating various grip positions like half crimp, open-hand, and pockets targets different finger muscles and contributes to balanced finger strength. This mid-level routine improves both maximal strength and strength-endurance, preparing you for more challenging climbing scenarios.
Advanced (Mixed Block)
[Describe advanced hangboard training methods]
Advanced climbers often adopt mixed block routines that combine maximal strength hangs, repeaters, and lock-off exercises within a single session for comprehensive finger conditioning. This might include weighted hangs on very small edges, single-finger hangs, or one-arm work on a sturdy pull bar integrated with your climbing hangboard. Rest intervals are shorter, and intensity is higher, sometimes with added load using weight belts or vests.
Advanced routines also emphasize recovery management and injury prevention strategies due to the increased stress on tendons and pulleys. Integrating hangboard training into your climbing week with rest days and complementary strength work is critical to effectively incorporate these routines.
Techniques to Increase Difficulty and Benefits

Using Weight Safely
[Explain safe methods for adding weight]
Adding weight during hangboard training is an effective way to increase challenge and build maximal finger strength beyond body weight limits. However, caution is paramount to avoid injuries to tendons and pulleys. Start by hanging with your body weight only, then gradually add small increments of weight using weight belts or weighted vests once you can comfortably hold for the target duration (usually 7-10 seconds).
Rest intervals should be longer (3-5 minutes) to allow adequate recovery, and the added load should be fine-tuned to cause failure within the intended hang time. Avoid large jumps in weight between sessions, and always maintain proper form with engaged shoulders and core to protect joints and tendons.
Reducing Edge Size
[Detail the method of decreasing edge size]
Another proven method to increase hangboard difficulty is decreasing the size of the edges you grip. Smaller edges demand greater finger strength and precise force application, stimulating tendon adaptation and finger power improvements. Moving from larger, jug-like holds to crimps, then to shallow edges or even single-finger holds, adds progressive load on your grip.
Keep close track of your edge sizes and progress slowly, as reducing edge size too quickly increases injury risk. This technique works well in combination with weighted hangs, allowing you to progressively overload your fingers in a controlled manner.
Tempos and Isometric Pauses
[Describe tempo variations and isometric pauses]
Manipulating the pace of your hangs can amplify training benefits beyond straightforward static hangs. Performing slow, controlled eccentric or concentric phases—such as slowly lowering off the edge or pulsing your grip during a hang—increases time under tension, enhancing muscular endurance and tendon strength.
In addition, incorporating isometric pauses where you hold the hang in a mid-position, like locking off at a slight elbow bend, targets the muscles differently and helps replicate real climbing positions. Working with varied tempos prevents monotony, promotes neuromuscular coordination, and strengthens tendons and muscles through different contraction types for comprehensive finger conditioning.
Injury Prevention and Warm-Up
Safe Grip Technique
[Explain safe grip techniques]
Maintaining a safe grip technique is vital to prevent finger and tendon injuries during hangboard training. Always keep your shoulders engaged and pulled down away from your ears, with elbows slightly bent and facing each other to create a stable position.
Your core should be activated to align your hips and reduce unnecessary swinging or strain on your fingers. Avoid using the full-crimp grip with thumb lock, as this position puts excessive stress on finger pulleys. Instead, emphasize open-hand or half-crimp grips while ensuring smooth and controlled transitions on and off the board.
Proper alignment and muscle engagement not only increase training effectiveness but also significantly reduce injury risk.
Common Mistakes
[Highlight common errors and how to avoid them]
Several errors during hangboard training can lead to injury or stalled progress. One common mistake is starting intense sessions without a thorough warm-up, which reduces blood flow and tendon pliability, making your fingers more susceptible to strains.
Another is rushing into hangs on very small edges or adding weight too quickly, which can overload tendons before they adapt. Hanging with relaxed shoulders or locking elbows increases the risk of joint and tendon injuries.
Furthermore, neglecting sufficient rest between hangboard sessions or training too frequently without recovery leads to overuse injuries. It’s important to warm up dynamically for 10–15 minutes, include finger and wrist mobility exercises, and respect rest days to allow your tendons to recover and strengthen safely.
Integrating Hangboarding into Your Week
Pairing with Climbing/Campusing
[Explain how to balance hangboard training with climbing]
To optimize your training, it’s important to balance hangboard sessions with actual climbing and other exercises like campusing. Many climbers find it beneficial to perform hangboard workouts earlier in the day, followed by climbing later, allowing a few hours of recovery between sessions. This scheduling helps to maximize finger strength gains without overly fatiguing the muscles when you climb.
If you plan to climb after hangboarding, it’s advisable to wait at least 15 minutes and stick to easier routes (around V0-V1) to avoid overtaxing your fingers early. More experienced climbers can integrate hangboard training alongside campusing and general strength work, carefully tuning volume and intensity to avoid injury and ensure continual progress.
Periodization and Deloads
[Describe the importance of periodization in training]
Effective hangboard training follows principles of periodization, cycling through phases of building strength, power, and endurance followed by planned recovery or deload weeks. For example, after 6 to 10 intensive hangboard sessions focusing on maximal strength, a climber should reduce intensity and volume to allow tendon adaptation and prevent overuse injuries.
Deload weeks might involve shorter hangs or assisted hangs with reduced weight or edge size. Periodization not only promotes steady improvement but also integrates naturally with climbing seasons, allowing you to peak for project attempts or outdoor trips while maintaining finger health.
Testing & Tracking
[Explain the importance of tracking progress]
Regularly testing and tracking your finger strength is key to informed progression on the hangboard. Consider periodic finger strength testing protocols, such as maximum weighted hangs or time-to-failure on a fixed edge, to gauge improvements objectively. Tracking hold sizes, weighted loads, hang durations, and rest intervals lets you adjust training intensity according to progress.
Many climbers keep training logs or use finger strength testing tools like the Metolius LightRail or smartphone apps designed for climbing. Consistent data helps identify plateaus or warning signs of fatigue, enabling smarter adaptations that lead to safer and more effective hangboard training over time.
Unlevel Edge: Finger-by-Finger Alignment and Safer Progression

The concept of an Unlevel Edge in hangboard training is designed to better match the natural anatomy of your hand by aligning each finger in a half-crimp position that accounts for their varying lengths. Traditional flat edges on hangboards don’t consider finger length differences, which can mean some fingers are over- or under-loaded during hangs, potentially causing uneven muscular recruitment and increasing injury risk.
Unlevel Edge training edges elevate specific sections of the board to ensure all fingers share the load evenly, promoting more balanced strength development across your fingers.
This finger-by-finger alignment not only enhances training effectiveness by maximizing muscle fiber recruitment but also reduces excessive stress on the stronger fingers and their pulleys, which often bear disproportionate loads on regular edges. Early reports and anecdotal evidence suggest that Unlevel Edges, like the Lattice MXEdge or Tension Climbing’s Whetstone board with its ergonomic bumps, help climbers achieve safer progression by distributing force more evenly, especially useful in injury rehabilitation and prevention.
While scientific research is still emerging, many climbers and coaches have embraced Unlevel Edge training for its potential to optimize finger strength gains and reduce injury incidence. Custom Unlevel Edges offer a tailored fit to hand morphology but are less accessible than commercial products, which generally use average finger-length adjustments.
Incorporating an Unlevel Edge into your hangboard setup can be a valuable step toward safer, smarter finger strength training that respects the individual nuances of your grip mechanics. For more information, visit Unlevel Edge.
8-Week Hangboard Progression
| Week | Edge mm | UE Angle | Load/Assist | Time (s) | Rest (s) | Sets | RPE | Notes |
|---|---|---|---|---|---|---|---|---|
| 1-2 | 20 | 15° | Assist | 10 | 60 | 3 | 6 | Focus on form |
| 3-4 | 18 | 15° | Bodyweight | 10 | 60 | 4 | 7 | Increase sets |
| 5-6 | 16 | 20° | Bodyweight + | 12 | 50 | 5 | 8 | Start adding weight |
| 7-8 | 14 | 20° | Weighted | 12 | 50 | 6 | 9 | Maximize strength |
Warm-Up and Safety Checklists
Warm-Up Checklist
- Light cardio (e.g., jumping jacks) – 5 minutes
- Wrist and finger mobility exercises – 3 minutes
- Active hangs on large holds (20 mm+) – 2 sets of 5 seconds
- Submaximal hangs – 2–3 sets
Safety Checklist
- Engage shoulders before hanging
- Keep elbows slightly bent
- Avoid full-crimp grips
- Limit total hang volume
- Stop immediately if experiencing sharp A2/A4 finger pain
Mini FAQ
What are the essential warm-up steps to follow before starting hangboard training to avoid injury?
Essential warm-up steps before hangboard training include: starting with submaximal hangs on large holds (20mm+) for about 30 seconds to activate shoulders and fingers; performing dynamic stretches like side splits with trunk flexion; warming forearms with flick exercises; doing light weighted shoulder and arm sequences; and progressively increasing hang intensity with good form.
How can I safely progress in intensity and difficulty when using a hangboard?
To safely progress on a hangboard, start with large holds, short hangs (5–10 seconds), and long rests (50–60 seconds), limiting sessions to twice weekly with 48 hours recovery. Use proper form: engage shoulders, keep elbows slightly bent, and avoid full crimp. Gradually increase hang time or decrease rest intervals.
Always listen to your body and avoid pain.
What are the recommended rest intervals between hangs and sets in a typical hangboard protocol?
Recommended rest intervals in hangboard protocols vary by method: Repeaters typically use short rests like 5 seconds between 10-second hangs or 3 seconds between 7-second hangs. Max-weight hangs require longer rests of at least 3 minutes between hangs for full recovery. Between sets, resting 3-5 minutes is common.
How should I choose hangboard grips and holds to best match my climbing goals for specificity?
Choose hangboard grips that closely replicate the holds and sizes of your main goal routes to ensure specificity. Focus on a limited set of fundamental grips similar to your climbing style and weaknesses, progressively increasing difficulty or adding weight. This targeted approach helps track progress and prevents injury.
Printable Resources
Download and print the following checklists to enhance your training:
- Printable Warm-Up Checklist
- Printable Safety Checklist
Risk Disclaimer
Hangboard training carries inherent risks of injury. Always consult with a professional coach or medical advisor before starting any new training regimen. Listen to your body, prioritize proper form, and avoid overtraining to minimize risks.
Conclusion
Hangboard training is a proven method to boost your finger maximal strength, endurance, and overall climbing performance. By carefully selecting the right equipment, following effective routines, and progressing safely with techniques like adding weight or reducing edge size, you can steadily improve your grip and finger power. Prioritize injury prevention through proper warm-up, safe grip technique, and sensible scheduling in your weekly training plan.
Remember, consistency and tracking your progress are key. Start incorporating hangboard training thoughtfully today, and watch your climbing capabilities reach new heights.
For more information on Unlevel Edge products and training techniques, visit Unlevel Edge.
Author: Climbing Coach John Doe, 10+ years of climbing and training experience.