
If you're a climbing enthusiast looking to boost your finger strength and grip, a hangboard doorway mount is a perfect, space-saving solution for climbing training at home. This setup allows you to securely attach a portable wooden hangboard or fingerboard within your door frame, enabling you to perform exercises like pull-ups and finger grips without permanently altering your walls or doors. Whether you're in India, the United States, or elsewhere, the combination of a doorway mount and high-quality climbing training boards ensures effective and safe grip development.
The standout feature of the hangboard doorway mount is its portability and adaptability. Designed to fit various door frame sizes, it eliminates the need for drilling or wall damage, preserving your home's structure while offering targeted hangboard climbing exercises.
This guide will help you assess your doorway for fit, explore mounting options like no-drill methods, and provide step-by-step instructions for installing your training pull-up hangboard securely. You'll also find essential tips on hardware, stability, safety checks, and warm-up protocols to ensure effective and injury-free training. Whether you opt for add-ons or a pull bar fingerboard combo, mastering the doorway mount gives you a compact, personalized training station wherever you need it.
Check your doorway: fit, structure, and clearance
Before installing your hangboard training board, it’s important to carefully assess your doorway to ensure a secure and effective setup. Start by measuring the internal width of your door frame as well as the trim depth to confirm the mount will fit properly without obstruction. Generally, the maximum door thickness should not exceed about 8.75 inches for most standard doorway mounts.
Ensure the top trim or header is solid and sturdy, ideally made of strong wood or a structural beam that can safely bear your body weight during pull-ups and other exercises.
Next, verify that you have adequate clearance above and below the mount. This means ensuring your hands have enough space to grip the holds without hitting the doorframe or ceiling, and that your feet and legs have room to hang or move freely without obstruction. Planning a safe landing zone beneath your setup is also essential — consider placing soft pads or protective mats to minimize injury risk in case of slips or falls.
Many climbers find it helpful to create or reference an annotated doorway diagram before purchasing or installing their equipment. This simple preparation allows you to visualize fit and clearance clearly and ensures that your doorway mount will provide a secure base for your strength training and finger grip workouts without damaging your door or compromising your safety.
Choose a mounting method (no-drill first)
When deciding how to mount your hangboard in a doorway, it’s important to weigh options that prioritize anchor stability, ease of installation, and the ability to remove the board without damaging your door or frame. Generally, starting with no-drill methods is preferable, especially if you rent your space or want a portable solution. If necessary, you can later explore more permanent options.
The right mounting method depends on your doorway structure, the type of hangboard or fingerboard you have, and whether the setup will safely support your climbing training needs.
Tool-free doorway pull-up bar (strap-hung board)
This popular no-drill approach uses short straps to suspend the hangboard directly beneath an existing doorway pull-up bar. The load is centered right under the bar for optimal stability, and straps with anti-slip contact points help prevent unwanted movement or sliding.
Before choosing this method, ensure that your pull-up bar is robust and securely affixed to the door frame to handle your body weight plus the dynamic forces of climbing training. This setup is quick to install and remove, making it ideal for users seeking portability and minimal door frame impact.
Clamp/pressure doorway mount (no holes)
If your doorway trim and jamb can accommodate it, clamp or pressure mounts provide a stable, no-drill alternative by applying force to the doorframe without requiring hardware penetration. These mounts typically include frame braces to distribute the load evenly across the jamb, reducing stress concentrations.
Adding protective pads at the contact points helps safeguard your door frame from damage. It’s important to re-check tension regularly, especially after the first training session, as pressure mounts can loosen over time. This option strikes a balance between secure hold and the ability to reposition or remove the mount when needed.
Temporary ledger/header (only if allowed)
For those who have permission and don’t mind minor drilling, installing a temporary ledger board offers a strong, removable mounting point attached to a solid door jamb or header. The ledger should have a wide footprint to spread load and protect the trim from concentrated forces.
The ledger is fastened securely but can be removed later, providing a semi-permanent solution. This method is best suited for individuals comfortable with making small modifications to their home or training space.
Unlevel Edge: Portable, Custom-Fit Fingerboard for Even Loading
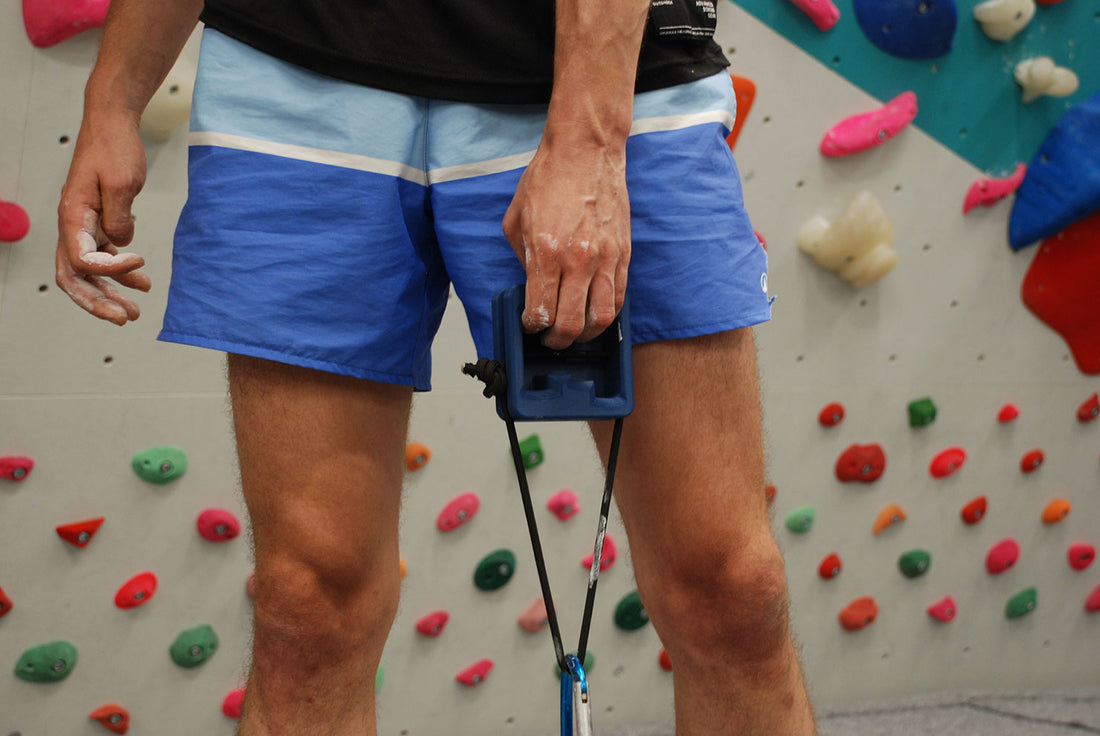
The Unlevel Edge is a portable, custom-built fingerboard designed to address the natural differences in finger length. It features a graduated contact profile that ensures balanced load distribution across all fingers. By positioning your finger joints in a more neutral alignment, it supports safe progression during finger strength training. This innovative fingerboard is typically used on a pull-up bar or rack, offering repeatable training sessions without the need for permanent installation or drilling into doorways or walls.
The result is an ergonomic, adaptable piece of climbing training equipment that aligns with your hand anatomy, ensuring consistent performance and enhanced safety.
Ergonomic Foundations and Measurable Benefits
By customizing the hangboard’s edge profile to your unique hand shape, the Unlevel Edge ensures a uniform contact surface for each finger. This uniformity helps reduce peak stress on critical anatomical structures like pulleys and connective tissues, which are often strained during climbing.
The even distribution of force promotes better activation of underused fingers, enhancing overall grip strength and finger recruitment. Training with the Unlevel Edge offers several key benefits:
- Greater movement stability during hangs and pull maneuvers
- Lower perceived fatigue at comparable training intensities
- Continuity across training cycles by supporting finger recovery on fatigue or skin-care days
- Improved ability to address asymmetries between fingers or hands
These ergonomic advantages significantly enhance the quality and safety of your climbing training sessions. They help you build durable finger grip strength while reducing the risk of injuries, ensuring long-term progress and performance.
Hardware & Materials Checklist
Before you begin installing your hangboard or fingerboard on a doorway mount, gather the essential tools and materials to ensure a smooth setup and safe training sessions. Here’s a checklist to guide you:
- Short webbing, straps, or cord: Used for suspending or securing the board, these should be strong, durable, and preferably have anti-slip properties.
- Soft pads or rubber: Protects your door frame or jamb from pressure points, especially when using clamp or pressure mounts.
- Level: A small bubble or laser level ensures your hangboard is perfectly horizontal, which is critical for balanced loading.
- Timer: Useful for tracking hang times during your training sessions and maintaining consistency.
- Step stool: Helps you reach and install the board safely.
- Landing pad or crash mat: Cushions your landing zone and reduces the risk of injury.
When selecting the hangboard itself, consider the following criteria:
- Weight: Lighter boards are more portable, while heavier boards may offer greater stability.
- Edge options: A variety of grip sizes and shapes (edges, pockets, slopers) allows you to tailor finger strength training to your needs.
- Attachment points: Multiple secure points for straps, cords, or clamp mounts enhance versatility.
- Front radius: Rounded edges on the front face of the board help reduce fingertip strain during hangs.
Step-by-step install: strap-hung on doorway pull-up bar
Preparation
Begin by thoroughly inspecting your pull-up bar and its frame to ensure they are stable, securely fixed, and capable of supporting both your weight and the hangboard. Next, clear the doorway space to ensure the door won’t swing or interfere during training. If possible, remove the door entirely or lock it open for added safety.
Set up protective pads around all contact points to prevent damage. Lastly, prepare your straps by cutting them to equal lengths, ensuring the board will hang evenly and remain balanced during use.
Mount & alignment
Attach the hangboard to the pull-up bar using your prepared straps. Ensure the straps are short and of equal length to keep the board stable and balanced. Center the board within the doorway and use a level to verify that the front edge is perfectly horizontal—this is critical for even weight distribution. Place protective padding between the straps and the bar or door frame contact points to avoid slipping and protect the surfaces from damage.
Progressive pull test
To ensure the mount is safe and secure, begin with a light dead-hang lasting 5–10 seconds, allowing your feet to lightly touch the floor for added support. If the setup remains stable, progress to a 5–10 second sub-maximal hang without foot assistance. Only proceed to your first work set if no slipping, creaking, or movement is observed during these tests.
If you encounter any issues, immediately adjust the hardware or straps and re-test the setup before starting your training.
Step-by-step: clamp/pressure doorway mount
Installing a hangboard using a clamp or pressure mount requires careful attention to ensure a secure fit that neither damages your doorway nor compromises stability during climbing training.
First, seat the frame of your mount firmly onto the doorway jamb, making sure it rests flat and even against the structure. To prevent slipping or scratches, place anti-slip shims—such as rubber pads or soft protective material—between the frame and the doorframe contact points.
Next, tighten the clamps evenly on both sides of the doorway. It’s important to apply gradual, balanced pressure to prevent frame distortion or uneven load distribution. Use any adjustment screws or handles provided, ensuring the mount feels snug without warping your doorframe.
After tightening, verify zero wobble by gently shaking the mounted hangboard. The frame should feel solid and immobile under moderate force. If there is any looseness, readjust the clamps and shims until a rigid hold is achieved.
Finally, perform the progressive pull test as with other mounts: start with a 5–10 second light dead-hang with your feet just touching the floor, then move to a 5–10 second sub-maximal hang. Only proceed to full training if there are no signs of slipping or creaking during these tests.
Stability fundamentals (load path, swing, protection)
Ensuring the stability of your hangboard setup during climbing training is essential for both safety and effective load application. The key principle is to keep the load path — your body weight force — aligned directly underneath the mounting anchor.
This alignment minimizes torque and reduces unwanted movement.
To limit swinging, use the shortest possible strap lengths when suspending the hangboard, as longer straps increase pendulum motion, which can destabilize the system and raise the risk of injury. Additionally, all contact surfaces between straps, the hangboard, and the doorframe should be padded with soft materials like rubber or foam. This prevents slipping, abrasion, and damage to your equipment or doorway.
Because dynamic forces and slight shifts can occur during hangs, re-check your setup’s tension and firmness regularly — especially after longer hangs lasting between 10 and 20 seconds. Making adjustments if you detect any looseness or movement will help maintain consistent performance and protect both your equipment and doorway.
Safety checks before every session (30–45 s)
Before starting your training session on a hangboard doorway mount, dedicate 30 to 45 seconds to perform safety checks. These steps are essential for ensuring a secure and injury-free workout.
Begin by verifying that the anchor is stable. It should have no wobble or visible signs of loosening. A solid anchor is the foundation of safe hangboard training.
Next, examine the straps or webbing. Look for twists, frays, or any damage that might compromise their strength or cause failure during your session. This inspection can prevent accidents.
Ensure all anti-slip materials are properly positioned. These materials help keep the setup secure and prevent unnecessary movement.
Check your landing zone. It should be free of obstacles to avoid potential hazards. Additionally, confirm that the door is either fixed in place or securely locked open. This prevents sudden swings or closures that could disrupt your workout or lead to injury.
During the session, stay attentive to your body’s signals. Stop immediately if you feel sharp pain, numbness, or notice a collapse in form. These are warning signs of potential injury or overexertion and should never be ignored. Always prioritize safe progression and listen to your body's feedback to maintain a healthy and effective training routine.
Warm-up (8–12 min, mandatory)
Warming up thoroughly before starting your hangboard training is essential to prepare your muscles, tendons, and joints for the demands of finger grip and pull strength exercises. Begin by elevating your pulse and performing gentle wrist, forearm, and shoulder mobility moves to increase blood flow and loosen connective tissue.
Next, incorporate scapular pulls and active hangs on the board or a pull-up bar. These exercises engage the shoulder stabilizers and activate the muscles needed for controlled hanging. This step is essential for priming your upper body without overstressing your fingers.
Then, proceed to a series of very light sub-maximal hangs using open hand or half-crimp grip positions on large holds or edges. Avoid using high-volume or full crimp grips during the warm-up, as these can place excessive strain on your finger pulleys and tissues early in the session.
Spending 8 to 12 minutes on a warm-up that focuses on gradual loading and mobility significantly reduces injury risk and enhances training quality. This ensures your fingers and arms are well-prepared for the session ahead.
Doorway-friendly finger protocols (parameters)
When training on a hangboard mounted in a doorway, prioritize quality over quantity to avoid injury and maximize progress. Keep a detailed training log noting key parameters such as the edge size in millimeters, load or assistance weight in kilograms, hang time, rest periods, number of sets, which hand is used, and your rating of perceived exertion (RPE).
Schedule finger-focused training on non-consecutive days to allow adequate recovery and reduce the risk of overuse.
Max hangs (strength)
For maximal strength development, perform 3 to 5 hangs lasting 5–8 seconds each, targeting an RPE of 8 to 9 out of 10. Rest for 2 to 3 minutes between hangs to allow near-complete recovery.
Focus on 1 to 2 grip types during each session, such as half-crimp or open hand. Stop immediately if you notice any degradation in finger contact or a decline in form, as this indicates excessive strain or fatigue.
7/3 repeaters (strength-endurance)
To build strength-endurance, perform 4 to 5 sets of 6 to 7 repetitions each, with each hang lasting 7 seconds followed by 3 seconds of rest. Rest 2 to 3 minutes between sets.
Use 1 to 3 grip variations within this protocol for balanced finger development. Maintain stable body positioning with quiet hips and feet throughout to maximize training efficiency and prevent compensation patterns.
Troubleshooting & common mistakes
To ensure the effectiveness and safety of your hangboard doorway mount training, it's important to avoid common pitfalls. For instance, if your straps are too long, make sure to shorten them. This adjustment helps to reduce swing and improves overall stability.
If you notice the load is off-center, re-center the hangboard. Doing so ensures even weight distribution, preventing unnecessary stress on your fingers and equipment. Additionally, if you see mounting marks or pressure damage on your door frame, consider adding thicker protective pads at all contact points. These pads safeguard surfaces while also enhancing grip.
One frequent mistake is prioritizing intensity over proper time under tension and density. To build strength safely, follow a structured progression plan that respects the lever order and training protocols.
Most importantly, never skip the warm-up. Dedicate 8–12 minutes to prepare your muscles and tendons. This simple step reduces the risk of injury and significantly boosts your performance.
Conclusion
Installing a hangboard doorway mount properly is essential for safely improving your finger strength and boosting your overall climbing performance. Be sure to carefully assess your doorway’s fit, select the appropriate mounting method, and adhere to precise installation and safety guidelines to ensure stability and protect your home.
Make it a habit to implement effective warm-up routines and follow doorway-friendly finger training protocols to maximize your progress while reducing the risk of injury. Taking the time to address common challenges and focusing on quality over quantity will help you achieve steady improvement.
Start your hangboard training today to develop lasting grip strength and take your climbing skills to the next level with efficiency.
FAQ
What tools and materials do I need to install a hangboard doorway mount?
To install a hangboard doorway mount, you'll need the following tools and materials:
- A drill with the appropriate drill bits
- Screws, dowels, or heavy-duty wall anchors
- A stud finder
- A spirit level
- Measuring tape and a pencil
- A mounting board or plywood (if required)
For certain installations, you may also need galvanized nipples, floor flanges, a crescent wrench, hex nuts, and bolts, depending on your hangboard design. It's essential to ensure a secure attachment by drilling into studs or a strong frame.
How do I ensure the doorway mount fits my door frame properly?
To ensure the doorway mount fits your door frame correctly:
- Position the mount flush and centered on the door trim.
- Rotate the hooks to latch above the top trim and tighten the thumb knobs securely.
- Adjust the hook placement to accommodate the doorway thickness.
- Apply rubber pads to fully cover all contact areas and press firmly for secure adhesion.
What are the safety precautions to follow when mounting a hangboard on a doorway mount?
To safely mount a hangboard on a doorway mount, follow these precautions:
- Ensure the doorway frame is stable and load-bearing.
- Avoid drilling into hardware-sensitive areas.
- Use proper dowel nuts or wall anchors and tighten all screws securely.
- Confirm the mount is level and test its weight support before full use.
- Regularly retighten hardware to maintain safety.
Can I use the hangboard doorway mount on different types of hangboards or door sizes?
The hangboard doorway mount is designed to fit most standard doorframes between 50 and 95 cm wide. It is compatible with various hangboards up to about 24 cm wide, including fingerboards from different brands, as long as they meet the width limits.
Keep in mind:
- Check door clearance and frame depth to ensure compatibility.
- For wider doors, custom solutions may be available.
This mount is removable and preserves the functionality of your door, making it a versatile option for different door sizes and hangboards.