
If you're starting rock climbing training, a climbing board—also known as a hangboard or fingerboard—is essential for developing grip and finger strength. These tools are indispensable for tackling difficult routes and boulder problems. Climbing boards offer various holds and edges, allowing you to target different finger positions. This helps build the specific tension and pulling power needed for vertical and overhung walls. Whether you train at home, in a gym, or need a portable option for travel, climbing boards enhance finger strength through structured protocols that optimize endurance, power, and muscle balance.
Understanding the types of boards, proper setup, and training strategies will help you maximize your progress safely and efficiently. Turn your fingerboard sessions into productive workouts that complement your time on the rock or the spray wall.
Board Types and Who They Suit
Selecting the right climbing board depends on your specific goals—whether building maximal finger strength, improving power, or honing technical skills. Your experience level and any prior injuries should guide your choice, as some boards require more experience and finger health than others.
Fingerboard / Hangboard
The fingerboard or hangboard is ideal for developing maximal finger strength and strength-endurance. Training typically focuses on standardized holds like the 20 mm edge, ensuring consistency and progress tracking.
For best results and to prevent injury, limit sessions to two or three per week on non-consecutive days. This approach builds solid finger tension without overloading vulnerable tissues.
Campus Board
The campus board specializes in increasing explosive power and rate of force development (RFD). It involves dynamic movements without foot support, requiring low volume, long rest intervals, and impeccable form. This makes it unsuitable for beginners or those recovering from finger or shoulder injuries. Campus board training boosts your pulling power and ability to lock onto holds during dynamic moves.
Systems Boards (MoonBoard/Kilter/Tension)
Systems boards like the MoonBoard, Kilter, and Tension offer benchmark problems with consistent holds and angles for measurable progression. They are perfect for developing both power and power-endurance through varied, community-verified routes. The MoonBoard features smaller holds and a steeper angle for advanced climbers, while the Kilter and Tension Boards offer a softer, more ergonomic experience focused on fluid movement and body tension.
Spray Wall / Home Woody
Spray walls, including home woody walls, have dense holds that mimic outdoor rock textures and positioning. These boards support training in movement skills, density circuits, and projecting on controlled angles and hold sets. They allow you to practice technique and endurance in a dynamic, real-world scenario, complementing traditional fingerboard and campus sessions.
Setup & Ergonomics
Maximize your climbing board's potential while minimizing injury risk by prioritizing a safe and practical setup. This includes considering wall angles, hold radiuses, adequate flooring or mats for fall protection, and proper lighting for clear visibility.
Additionally, logging training sessions helps track progress and adjust protocols effectively.
Wall Angle & Layout
Climbing board angles typically range from 0° (vertical) to about 60°, allowing you to adjust intensity by changing your body position relative to gravity. Including a kickboard at the base aids foot positioning and warm-up exercises. A t-nut grid spaced about 10–15 cm apart offers versatile hold placement and customization.
Plan for rest footholds and safe down-climb routes to avoid injury and maintain training flow.
Holds & Edge Standards
Use a mix of climbing holds, such as crimps, slopers, and pockets, to address various grip types and finger training targets. Maintain at least one standard 20 mm edge as a baseline for testing finger strength and accurately logging performance over time. This consistency ensures reliable training progression and reduces injury risk.
Flooring, Lighting & Spacing
Ensure thick, continuous padding beneath your climbing board, especially around high-risk areas like campus or systems boards. This minimizes impact from accidental falls. Bright, even lighting is important for clearly seeing holds and body positions to maintain proper technique and safety.
Keep landing zones clear of clutter to create a safe, distraction-free training environment.
Safety & Warm-Up Essentials
Dedicate 8 to 12 minutes to a comprehensive warm-up before using your climbing board. Start with light cardio and mobility exercises to increase blood flow and loosen joints. Follow with active hangs on large holds to prepare your fingers and shoulders for tension work. Stop if... you experience sharp pain rated A2 or A4 on the pain scale, as pushing through can lead to serious injury.
Avoid high volumes of full-crimp grips during warm-up or training to reduce strain on finger pulleys.
Shoulder/Scapular Control
Maintain proper shoulder and scapular control during hangs to prevent injury. Retract and depress your shoulder blades to engage the correct muscles.
Keep your elbows soft to avoid locking joints and eliminate swinging motions, especially on campus boards. Controlled movement ensures shoulder stability throughout exercises.
Finger Positions
Prefer open-hand and half-crimp grips when training finger strength, as these positions place less stress on tendons compared to the full crimp. Reserve full-crimp grips for occasional use and avoid integrating them into high-volume training protocols to protect your finger pulleys and ligaments.
Frequency & Recovery
Allow 48 to 72 hours of recovery between intense fingerboard sessions to enable tendon and muscle repair. Manage your total time-under-tension during sessions and monitor skin condition, as excessive training and poor skin care can lead to injury and reduced performance. Prioritizing recovery ensures sustainable long-term progress in climbing finger strength.
Unlevel Edge on the Fingerboard
The unlevel edge enhances climbing fingerboards by better matching the natural anatomy of your hand. It addresses finger length differences and promotes balanced load distribution during hangs. Unlike traditional flat edges, unlevel edges raise or lower individual finger holds, allowing each finger to maintain a consistent half-crimp position. This improves force recruitment across all fingers and potentially reduces injury risks from uneven stress.
By encouraging straight finger-hand-wrist alignment, unlevel edges enhance grip efficiency and allow stronger individual finger flexor activation. This can increase force output by up to 25% compared to flat edges, making strength training more effective while reducing joint compression that can cause overuse injuries.
Unlevel edges also serve as an excellent rehabilitation tool for pulley injuries, chronic knuckle inflammation, and wrist issues. Their ergonomic design supports controlled, stable finger loading, building capacity without aggravating existing conditions.
Isolated finger engagement strengthens connective tissues and small hand muscles foundational to finger performance. Including an unlevel edge in your fingerboard setup offers a superior training experience, enhancing strength gains and injury prevention compared to standard edges.
For more information, visit Unlevel Edge.
Fingerboard Protocols (Strength & Endurance)
Progress methodically on your climbing fingerboard by increasing one variable at a time—time, density, or intensity—to avoid injury and ensure steady gains. Below is a summary table of common parameters in effective fingerboard protocols, balancing intensity, volume, and rest to develop both finger strength and endurance.
| Protocol | Duration | Load | Reps & Sets | Rest Time | Focus |
|---|---|---|---|---|---|
| Max Hangs | 5–10 seconds | ~80–95% of max (add weight or reduce edge size) | 3–6 sets, 2–3 mins rest | 2–3 minutes between sets | Maximal finger strength |
| Repeaters 7/3 | 7 seconds hang / 3 seconds rest | Challenging, usually less than max | 6–7 reps × 4–6 sets | 2–3 minutes between sets | Strength-endurance |
Max Hangs (Strength)
Max hangs build maximal finger strength by hanging for 5 to 10 seconds at approximately 80 to 95% of your technical maximum. Use added weight or progressively smaller edges to increase difficulty. Perform 3 to 6 sets with 2 to 3 minutes of rest between hangs for full recovery.
Progress by adding 0.5 to 1 kg of weight or reducing edge depth by about 2 mm once all reps in a session are completed cleanly.
Repeaters 7/3 (Strength-Endurance)
Repeaters mimic climbing’s intermittent gripping pattern, developing strength-endurance. This protocol involves 7 seconds of hanging followed by 3 seconds of rest, repeated 6 to 7 times per set, for 4 to 6 sets total. Choose 1 to 3 grip types to maintain high quality during each set.
Rest intervals of 2 to 3 minutes between sets help maintain form and power throughout the workout.
Testing & Logging
Accurately testing and logging your fingerboard sessions are critical for tracking progress. Re-test your maximal hang every 2 to 3 weeks using a 10-second add-weight hang on a standard 20 mm edge. Keep detailed logs of edge size (mm), load or assistance weight, hang duration, rest times, number of sets, Rate of Perceived Exertion (RPE), and if using unilateral grips, note the side.
This data allows you to objectively measure gains and adjust training protocols effectively.
Campus Board Protocols (Power/RFD)
Campus board training focuses on developing explosive power and rate of force development (RFD), essential for dynamic climbing moves. Due to the high stress on tendons and joints, emphasize strict technique, long rest periods, and never push to failure to avoid injury and ensure long-term progress.
Laddering (Contact Strength)
Laddering involves ascending 3 to 6 rungs per effort with precise control. Perform 3 to 5 sets, resting 2 to 3 minutes between sets for full recovery.
Start with larger rungs to build confidence and strength, maintaining perfect foot-off mechanics to enhance upper body load and finger engagement. This drill improves contact strength and coordination while reinforcing safe movement patterns.
Double Dynos / Touches
Double dynos and touches require explosive simultaneous movement of both hands to higher rungs. Complete 4 to 6 efforts per set, with 3 to 5 sets total, allowing 2 to 3 minutes of rest between sets.
Monitor your timing and landing quality; stop immediately if coordination or precision deteriorates to maintain safety and effectiveness. These moves push maximal power and dynamic control and should be reserved for climbers with well-developed finger strength.
Density Intervals (Advanced)
Density intervals involve short 10 to 20-second bouts of rapid moves on big rungs, with a work-to-rest ratio of approximately 1:3 to 1:4. These intervals train power endurance by repeatedly engaging explosive efforts under mild fatigue. Use density intervals sparingly, typically within defined power training blocks to avoid overtraining and maximize gains.
Systems/Moon/Kilter Sessions (Power & Measurable Progression)
Training on systems like the MoonBoard or Kilter Board allows you to track climbing power and progression through measurable benchmarks. Select benchmark problems and log attempts and successful climbs to adjust difficulty by modulating wall angle or hold families systematically. This enables objective evaluation of improvement over time.
Benchmark Problem Sessions
Start each session with a thorough warm-up to prepare your muscles and tendons. Select 3 to 6 benchmark problems that challenge your power level.
Perform 3 to 5 quality attempts on each problem, focusing on precision and efficient movement, with full rest periods between efforts to ensure maximal performance. This structured approach provides consistent data points for tracking progress across weeks and months.
Limit Bouldering vs Volume Blocks
Alternate training cycles between limit bouldering and volume or density blocks for balanced development. Limit bouldering focuses on short, hard boulder problems of 1 to 5 moves, emphasizing maximum power and strength. Volume blocks consist of chaining moderate-difficulty problems that challenge your endurance and movement skills over longer sessions.
This alternation prevents burnout while targeting multiple facets of climbing fitness.
Using Apps & Lights Effectively
Utilize apps and integrated lighting systems on boards like the MoonBoard and Kilter to log every attempt, track split times, and record perceived effort. Avoid accumulating low-quality, “junk” volume by focusing on deliberate, technique-focused sessions.
Consistent logging preserves valuable data that informs future training adjustments and maintains motivation through measurable milestones.
Spray Wall Sessions (Skill & Endurance)
Spray walls offer a unique training environment to develop movement economy and climbing endurance without the pressure of grades or fixed routes. This freedom lets you focus on refining technique and building sustained effort—essential for longer climbs or bouldering projects.
Technical Drills
Prioritize quality over quantity during spray wall sessions. Practice technical drills such as:
- Silent feet: Place your feet softly and precisely to conserve energy.
- Controlled pacing: Manage your effort across the climb.
- Hip turns: Improve body positioning.
- No match: Avoid bringing both hands to the same hold, encouraging dynamic and balanced movement.
Dedicate 20 to 30 minutes to focused, high-quality technical drills to enhance efficiency and skill on the wall.
On-Off Circuits
Build climbing endurance using on-off circuits that consist of 30 to 90-second bouts of climbing interspersed with short micro-rests. Start with manageable durations and progressively increase time on the wall and circuit density as your fitness improves.
These intervals train your ability to sustain movement under fatigue, mirroring the demands of longer climbs and providing a versatile way to develop power-endurance on the spray wall.
Weekly Templates by Level
Develop a consistent weekly training schedule tailored to your climbing level to ensure steady progress and prevent injury. Below is a template outlining session frequency, board focus, and fingerboard usage for beginners, intermediate, and advanced climbers, along with practical notes for each level.
| Level | Sessions / Week | Board Focus | Fingerboard Slots | Notes |
|---|---|---|---|---|
| Beginner | 3 | Technique & spray wall (2×), light fingerboard (1×) | Assisted hangs or reduced load, 1 session | Emphasize movement skills and injury prevention |
| Intermediate | 4 | Mix of climbing/boards (2×) + fingerboard max hangs & repeaters (1×) + optional light campus | Non-consecutive fingerboard days | Focus on balanced strength and endurance development |
| Advanced | 5–6 | Power blocks (campus/systems) + max hangs + density on spray wall | Dedicated fingerboard slots integrated with power training | Include deload week every 5–6 weeks to recover |
Beginner
Focus on technique development and building a solid foundation. Two sessions per week should target movement skills and climbing on a spray wall, combined with one light fingerboard session using assistance or easy holds. This approach allows gradual finger strength gains without risking injury.
Intermediate
Increase volume by adding a second climbing or board session per week alongside one fingerboard session emphasizing max hangs and repeaters. Optionally add light campus work to support power development.
Ensure fingerboard training days are spaced out to maintain recovery between high-intensity sessions.
Advanced
Incorporate focused power blocks involving campus and systems boards, combined with maximal strength sessions on the fingerboard and dense endurance workouts on spray walls. Increase training frequency to 5 or 6 sessions weekly, including a deload week every 5 to 6 weeks to optimize progression and minimize overuse.
Periodization & Progression (4–8 Weeks)
Implement systematic periodization in your climbing training by cycling through phases focused on strength, power, and endurance over 4 to 8 week blocks. This approach prevents plateaus, reduces injury risk, and ensures balanced development of physical qualities needed on the rock.
Adjust training volume carefully to match your skin and tendon tolerance, as these tissues can limit progress if overloaded.
During phases when strength or power isn’t the primary focus, maintain fitness with one light, maintenance-level session that preserves gains without excessive strain.
Rotate focus—from building maximal strength with targeted fingerboard work, to power development via campus and systems board sessions, and then onto endurance modalities like spray walls and on-off circuits. Each block should gradually increase load or intensity and include planned rest for recovery. This cyclic training model supports durable skin, resilient tendons, and sustained climbing performance over the long term.
Skin Care & Injury Prevention
Proper skin care is essential for maintaining healthy, durable hands and preventing injuries that can disrupt training and climbing sessions. Limit abrasive time on rough holds or overly frequent sessions that wear down your skin excessively. Regularly file down calluses with a nail file, sandpaper, or a dedicated climbing skin file to keep the surface smooth and avoid painful tears and flappers.
Hydration is vital; consistently apply climbing-specific moisturizers or balms containing natural ingredients like shea butter, beeswax, or aloe vera to keep skin pliable without making it too soft. Hydrating your skin after climbing aids repair and prepares it for future sessions.
For acute skin injuries such as flappers, tape the affected area to protect against further damage and allow healing.
One of the most serious risks climbers face is pulley injuries. Stop climbing immediately if you feel sharp pulley pain or any sudden intense finger discomfort to prevent worsening the injury. Prioritize warm-up, technique, and progressive loading combined with effective skin care to protect your hands and tendons for long-term climbing success.
Tools & Housekeeping
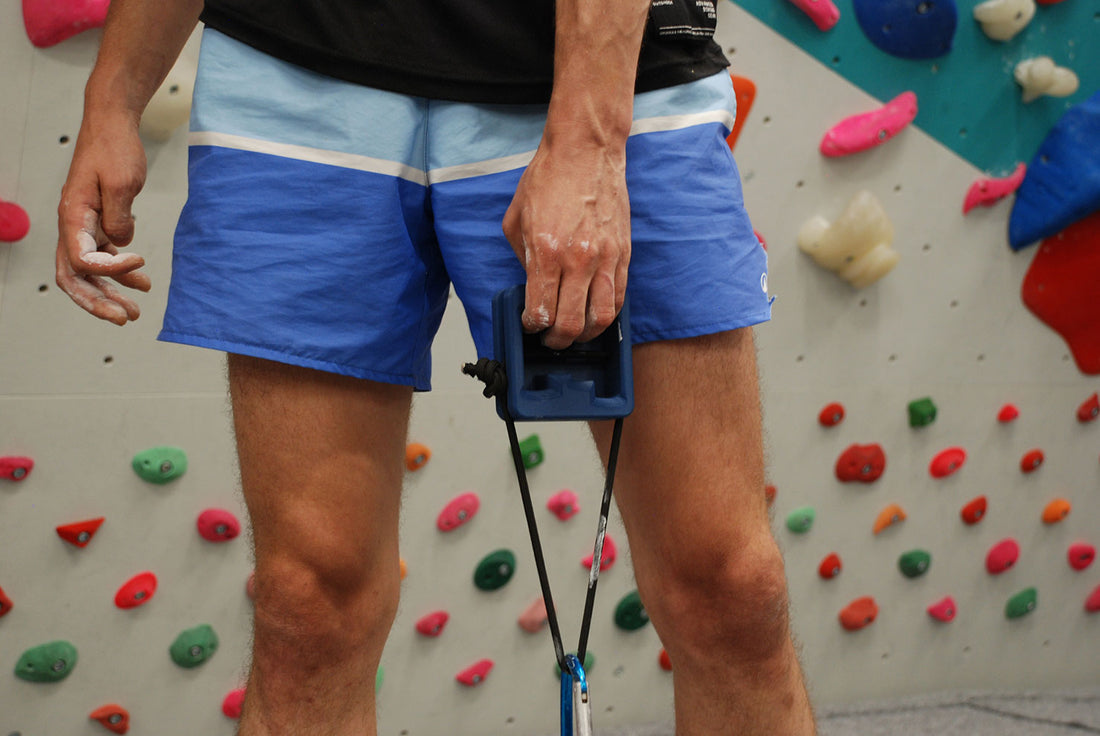
Use the right tools and maintain good housekeeping practices to enhance the effectiveness and safety of your climbing board training. A reliable timer is essential for tracking hang durations and rest intervals, ensuring you follow protocols consistently.
A pulley system or scale helps accurately measure load or assistance during hangs, allowing gradual progression with controlled intensity.
Assistance bands provide valuable support during rehab or warm-up sessions and enable training at various difficulty levels by reducing effective body weight. Keep a detailed training log—via an app or notebook—to track metrics such as hold sizes, added weights, set counts, rest times, and subjective effort.
Use consistent naming conventions for holds and sets in your log to improve clarity and simplify analysis over time.
Good housekeeping also includes routinely checking and maintaining your boards, pulleys, and accessories to ensure safety and longevity. Organize holds and training equipment, clear clutter around your training space, and ensure your timer and scales are calibrated for a smooth, injury-free training experience.
Conclusion
Climbing boards are vital for developing the specific finger strength, power, and endurance essential for climbing success. By choosing the right board type based on your goals and experience, setting up your training environment ergonomically, and following structured protocols with attention to safety and recovery, you can optimize your progress while minimizing injury risk.
Integrate periodized training cycles, maintain diligent skin care, and use accurate tools and logging for measurable improvement. Start crafting your personalized training plan today to elevate your climbing performance and achieve greater success on the rock.